Creating Contacts
Creating a new contact can be accomplished by either manually adding a singular contact, via API call, or by importing contacts via a csv file.
Adding a Singular Contact
1. Navigate to the Contacts page
- When adding the first contact, the page will display as shown below.
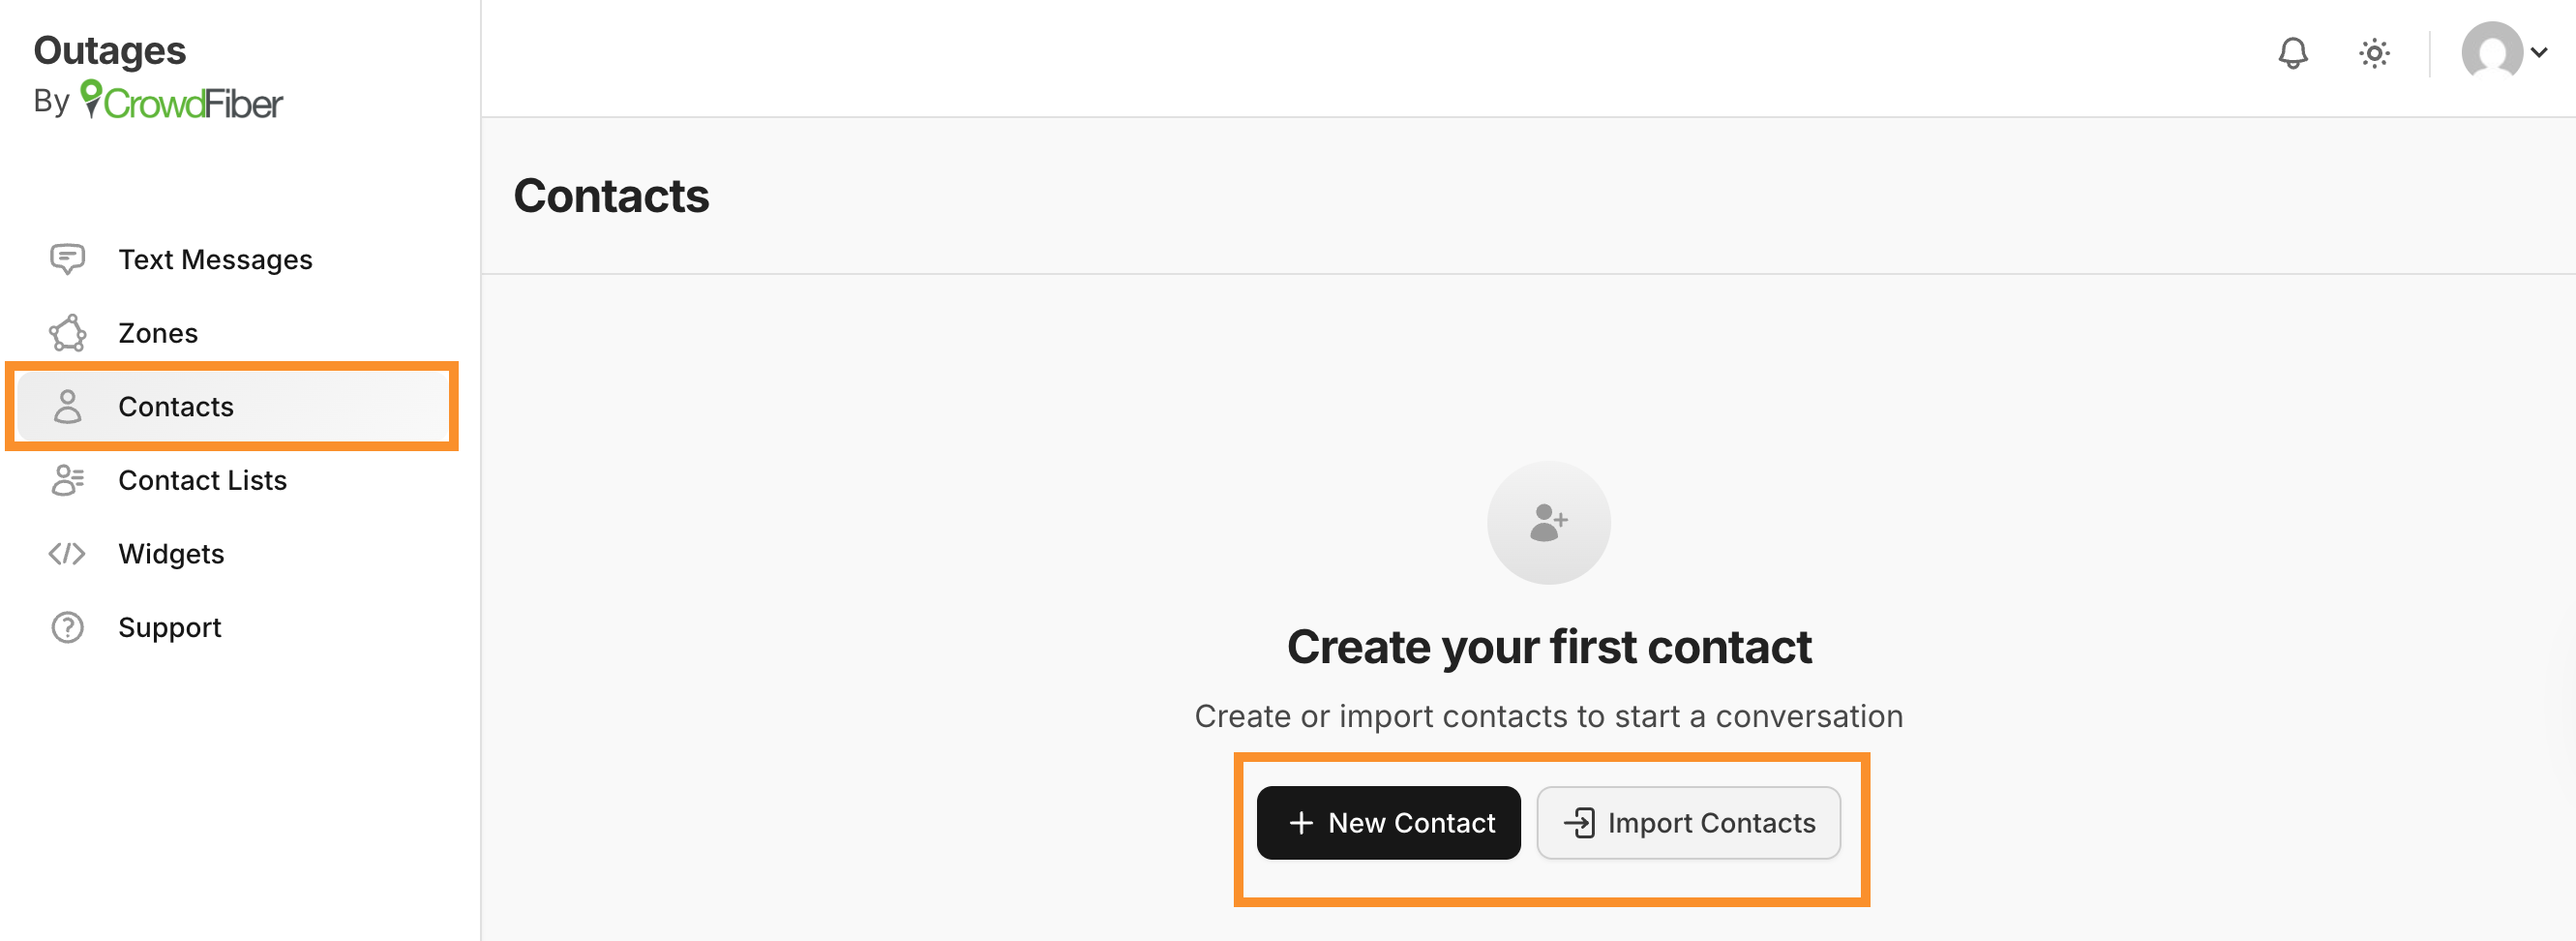
2. Select + New Contact
3. Input the Contact name, phone number, address, and any other information that you would like to include.
- Note: You may have as many names, numbers, addresses, etc. as you would like to add and store within your account.
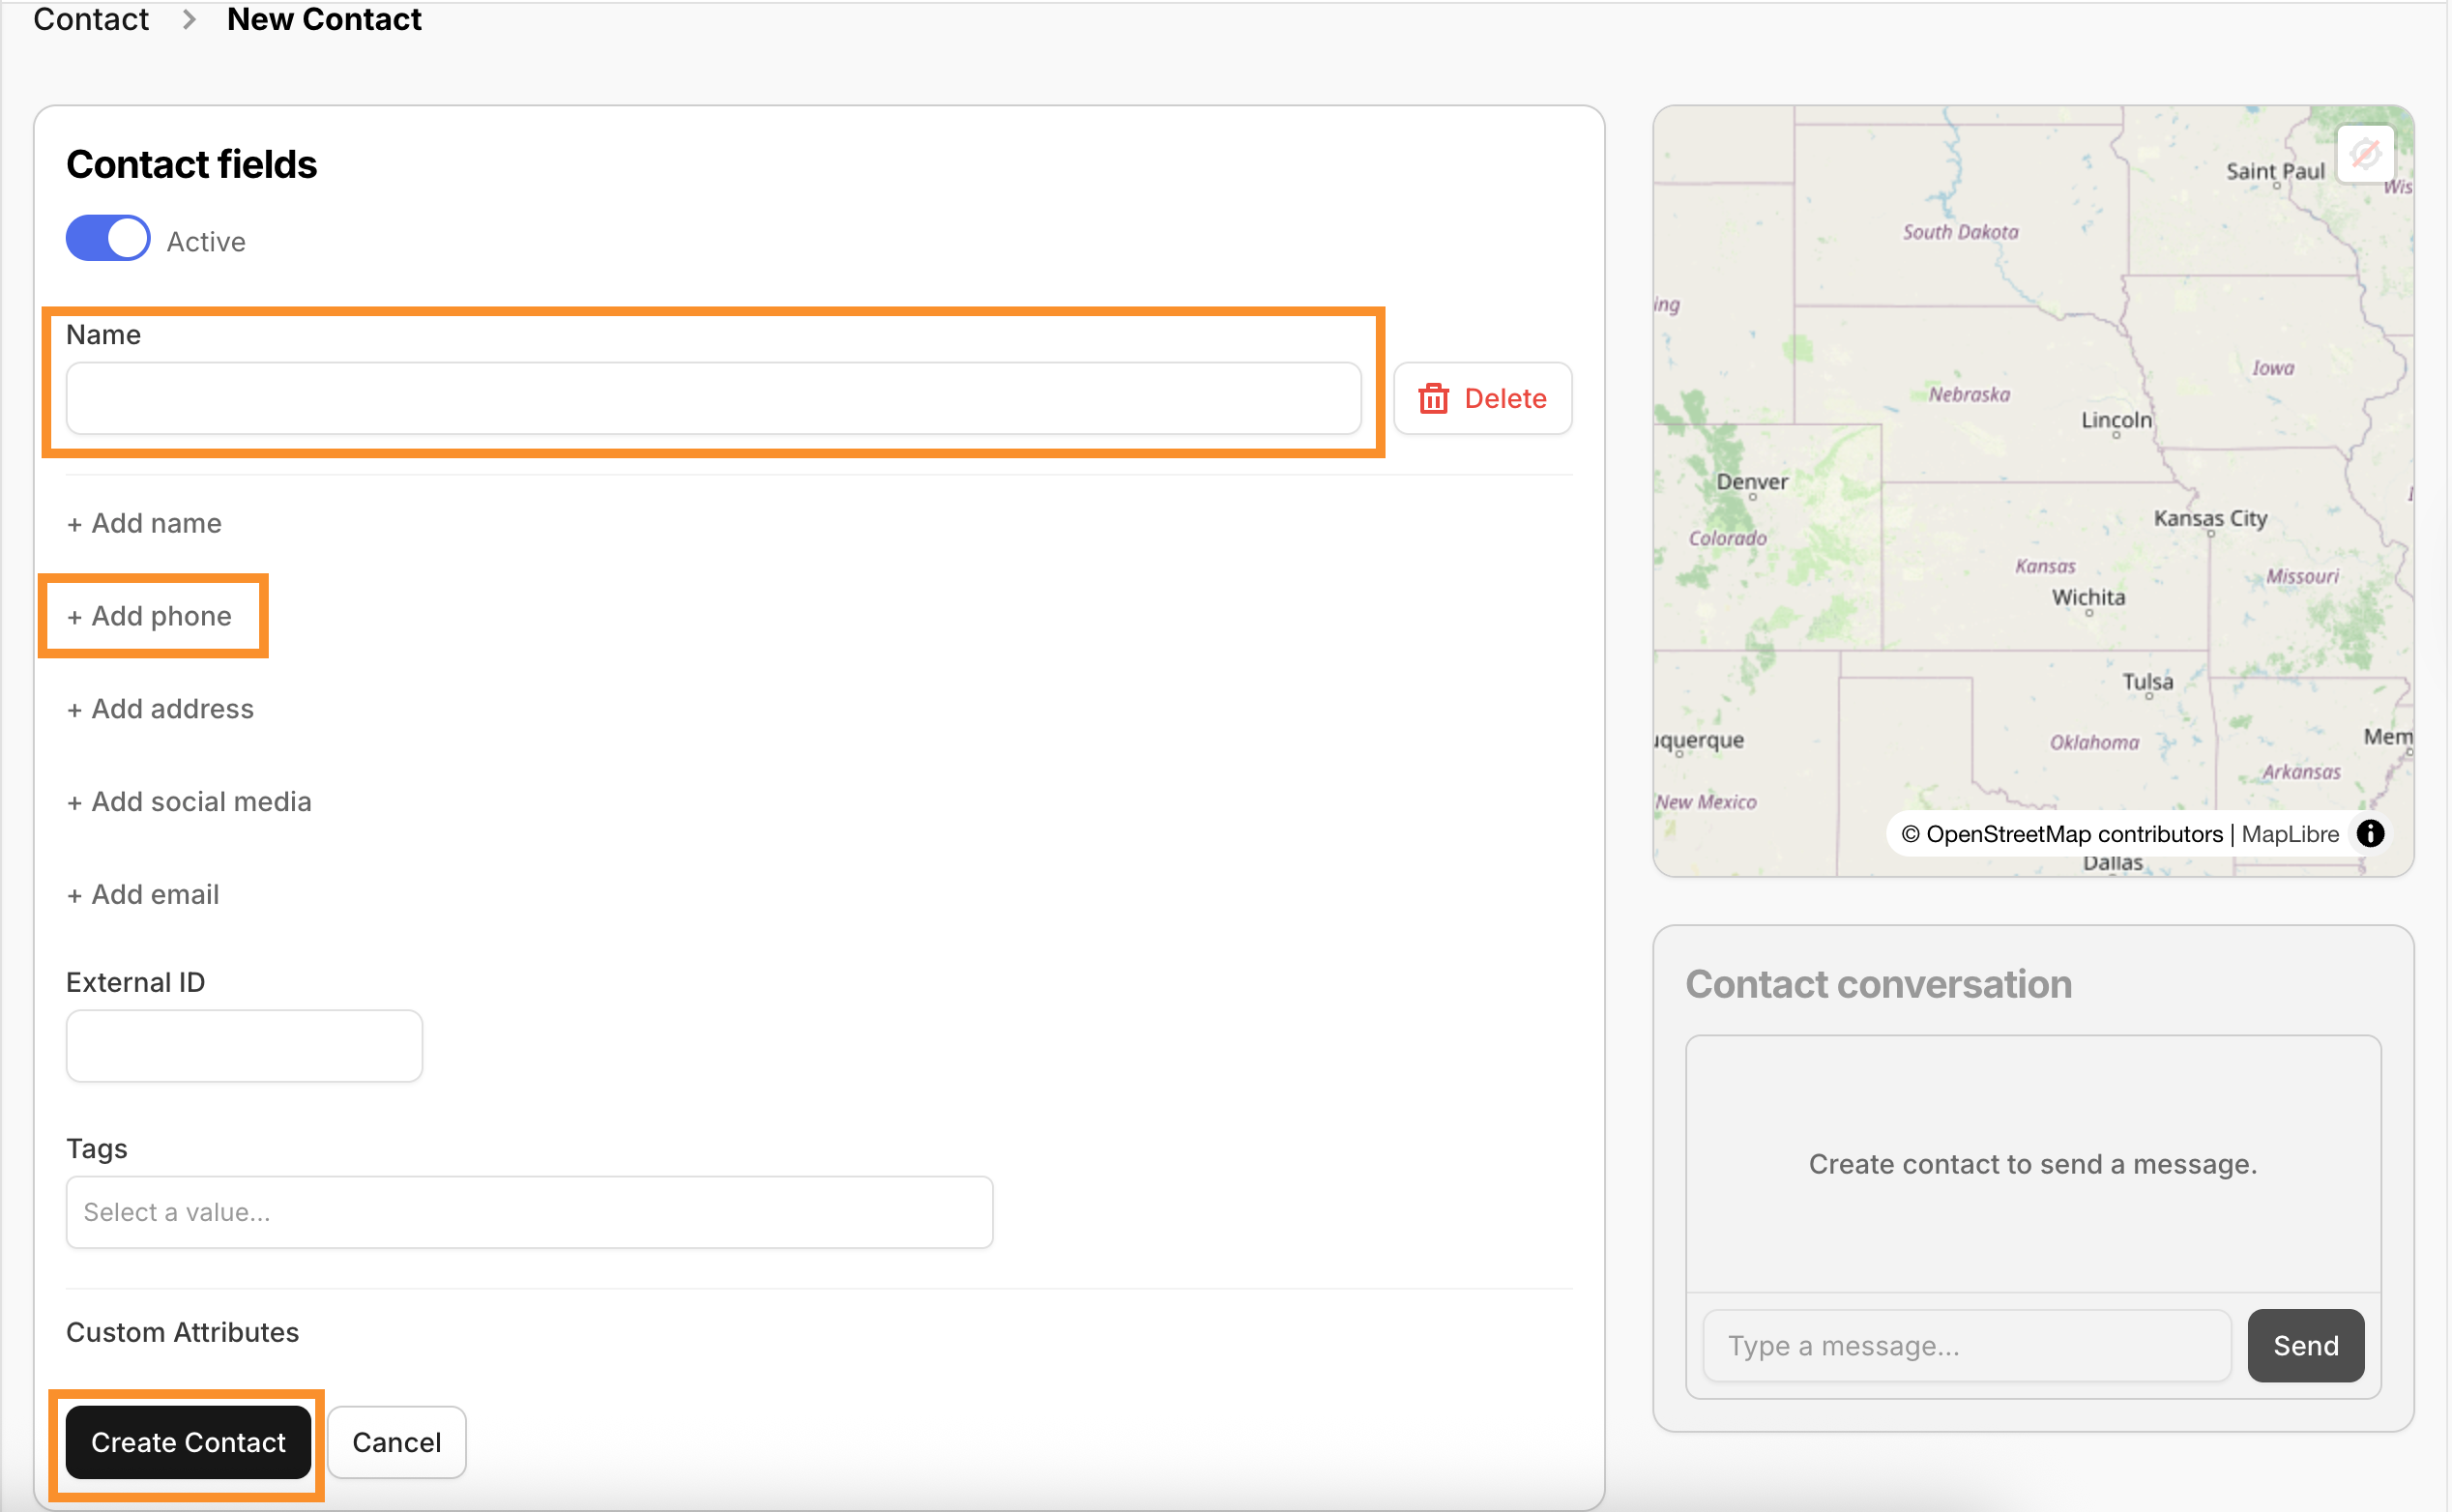
- External ID can be used as a field to associate the contact within the CrowdConversations platform to the same contact within your other systems.
- Tags may also be attached to your Contact record to allow for easy filtering!
-
Custom Attributes are custom to you and your use case.
- These are linked to from the contacts index.
4. Click Create Contact to save your new contact.
Creating a Contact via API
Documentation detailing use of the API and creating your contacts can be viewed here!
Importing Contacts in Bulk via CSV
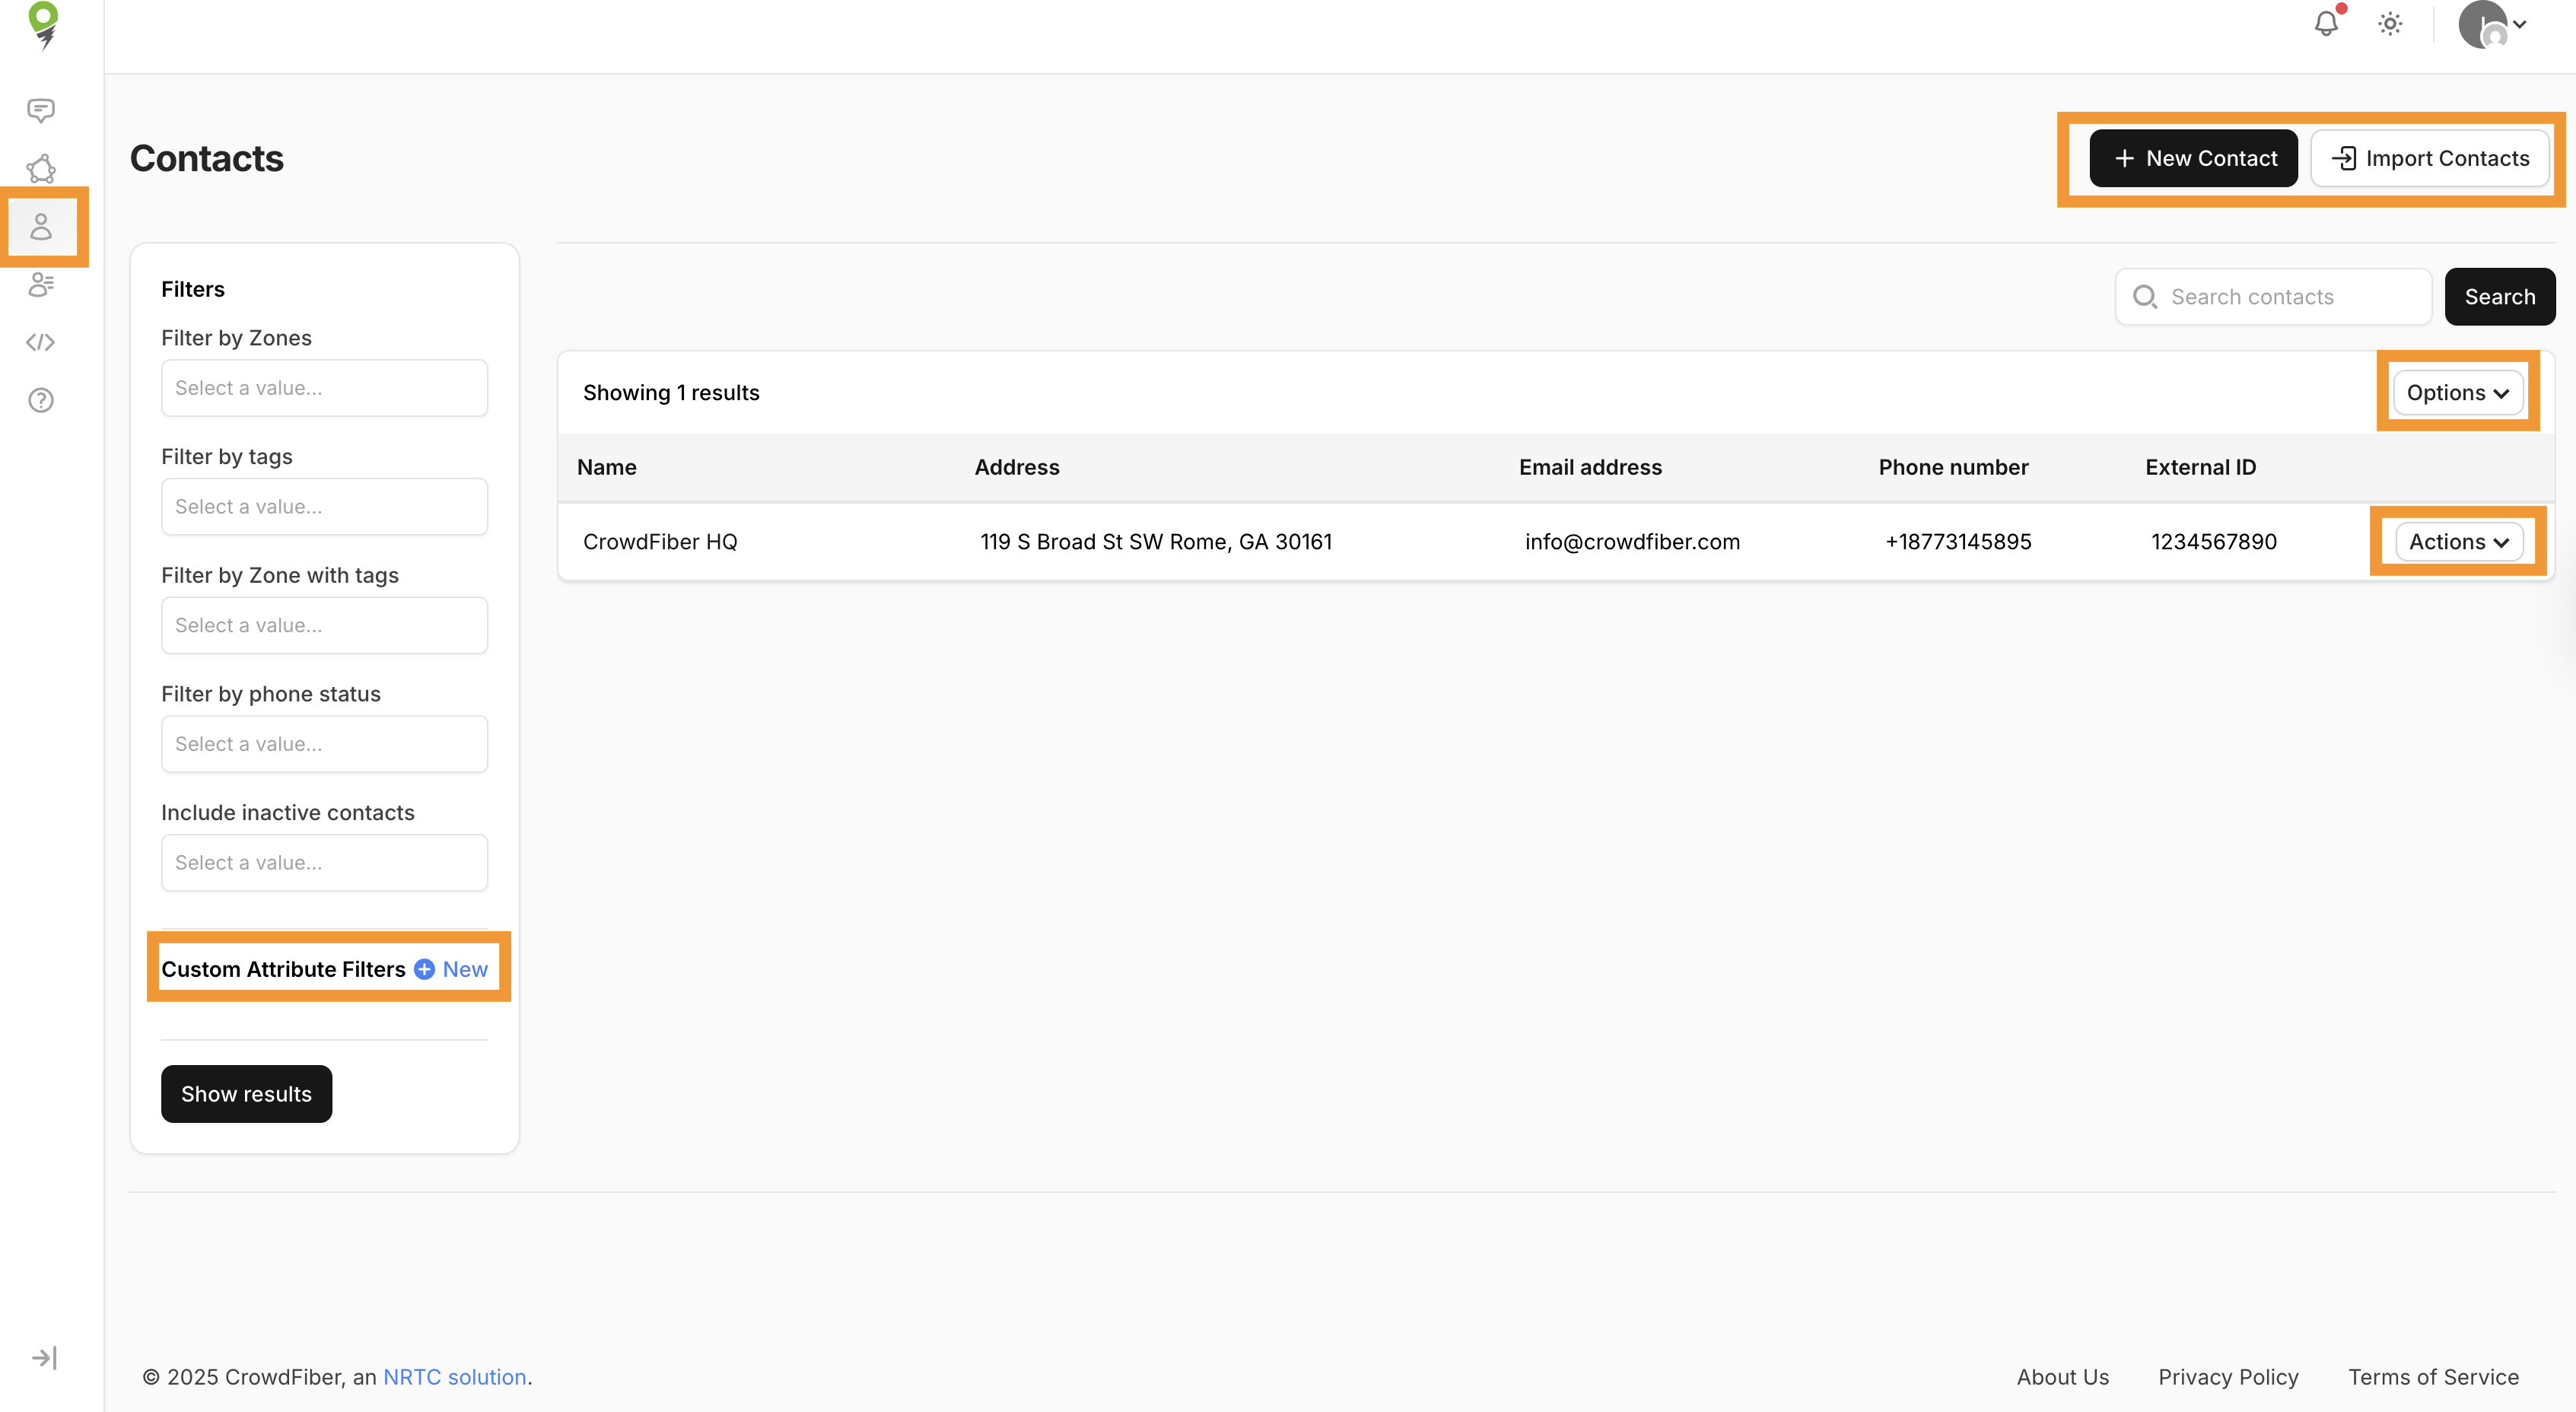
1. Navigate to the Contacts page
2. Select Import Contacts
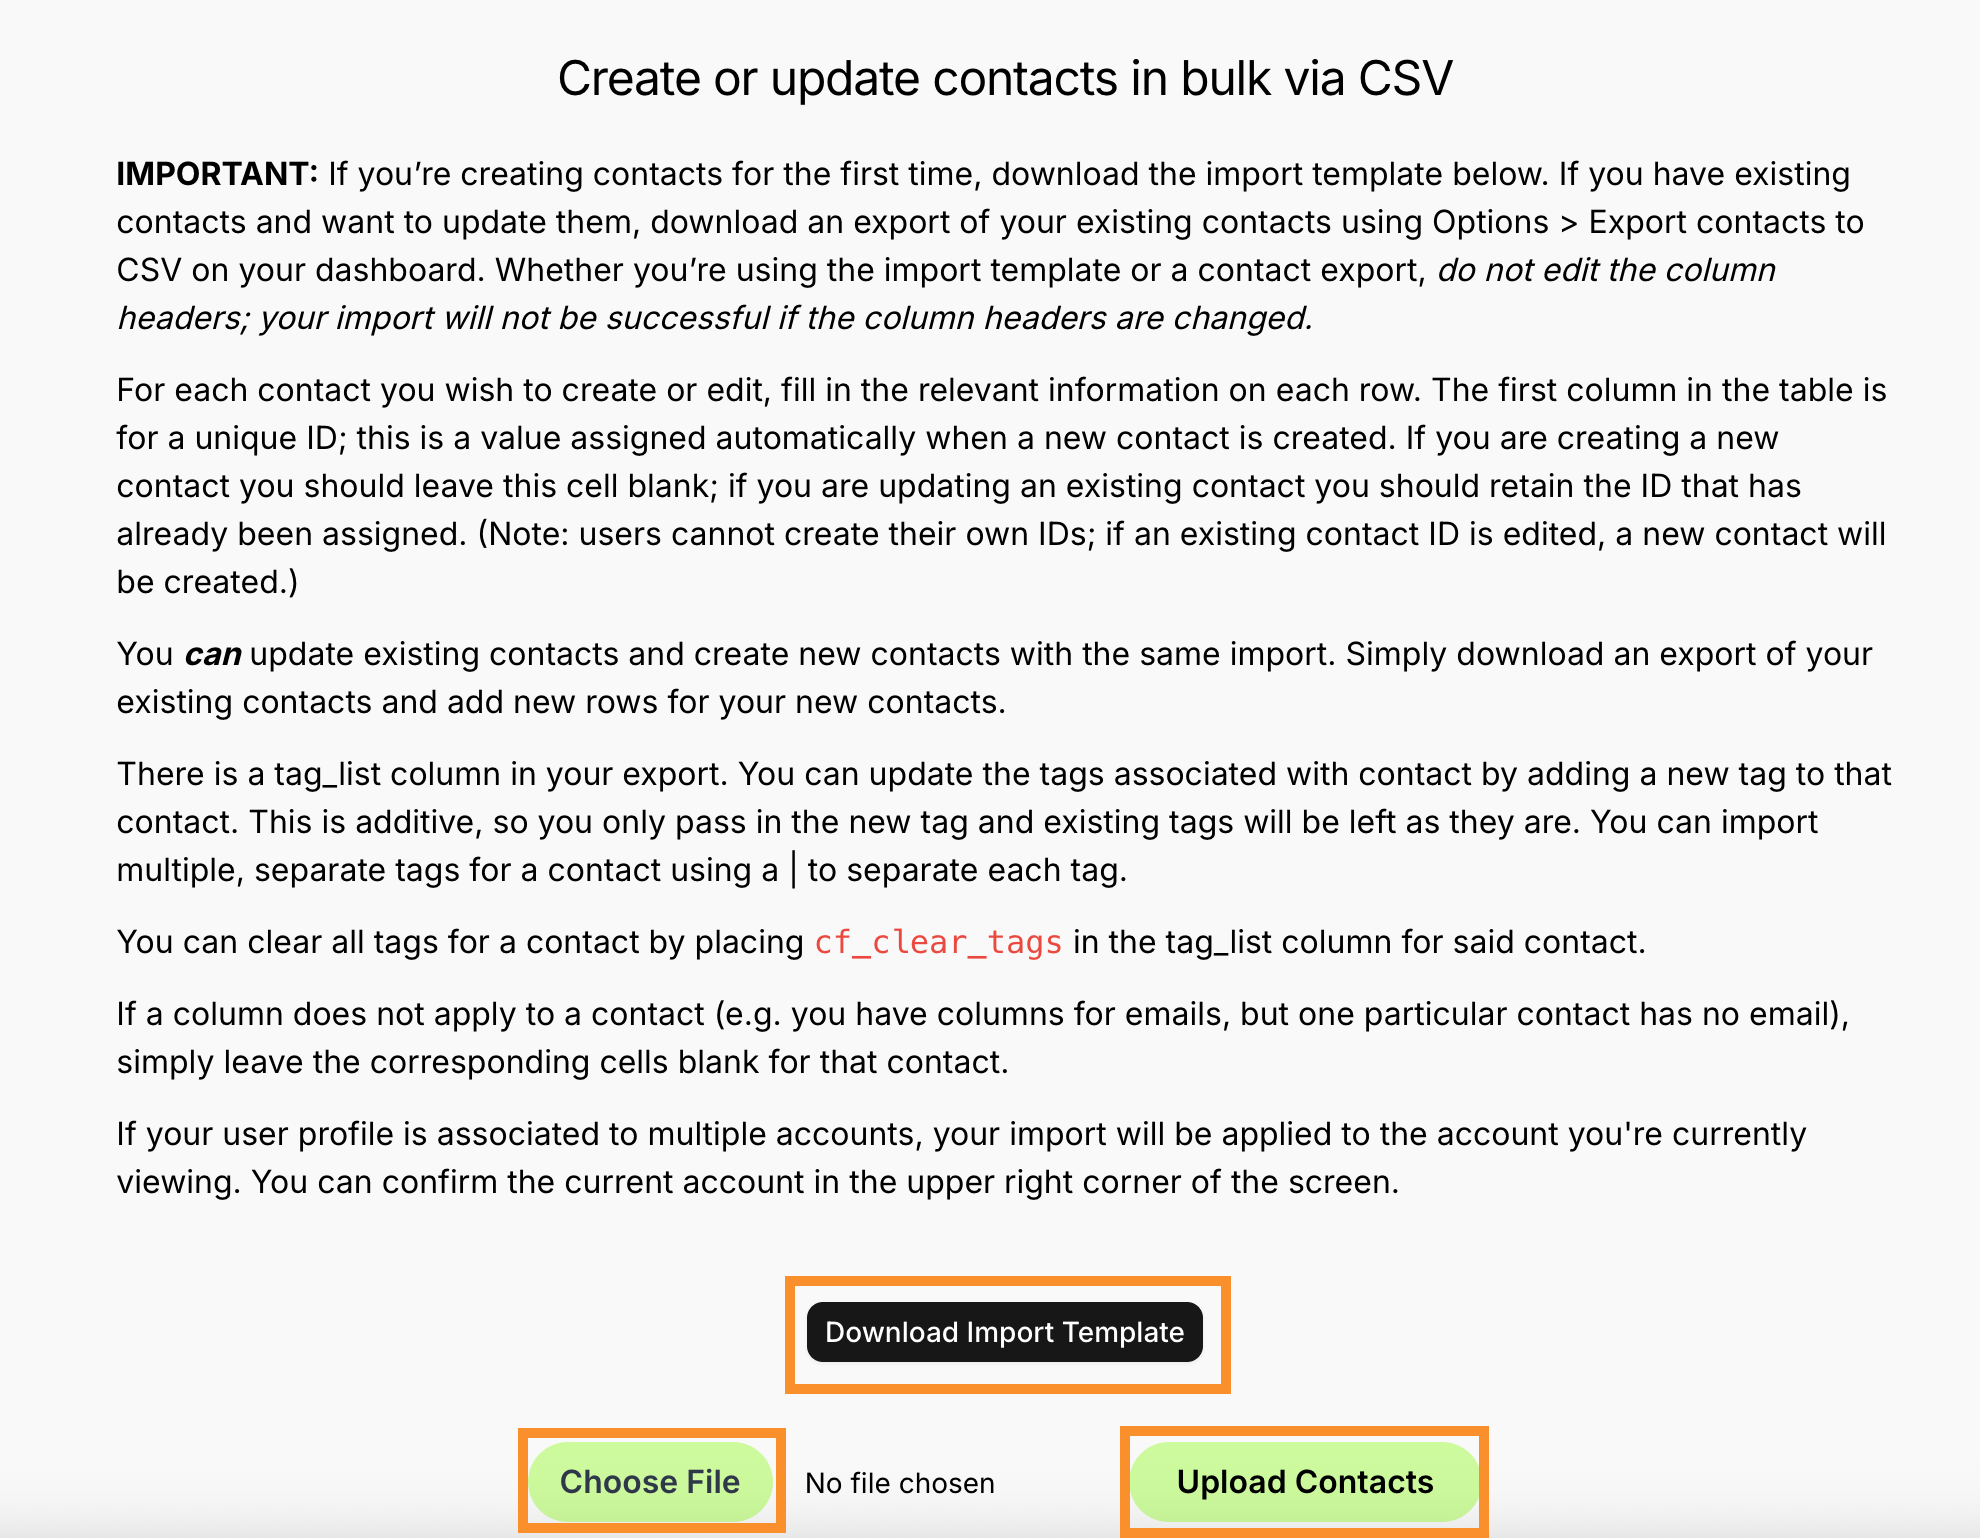
3. Download the Import Template
Important Note:
Each column does not need information nor even need to be included as a header but you cannot edit the column headers (ie - change "contact_uuid" to "uuid").
- For each contact you wish to create or edit, fill in the relevant information on each row.
- The first column in the table is for a unique ID; this is a value assigned automatically when a new contact is created.
- If you are creating a new contact you should leave this cell blank; if you are updating an existing contact you should retain the ID that has already been assigned.
- You can update existing contacts and create new contacts with the same import. Simply download an export of your existing contacts and add new rows for your new contacts.
- This update can occur using either the UUID or external ID associated with your contact.
- You can update the tags associated with a contact by adding a new tag to that contact via the tag_list column in the import file. This is additive, so you only pass in the new tag and existing tags will be left as they are.
- You can import multiple, separate tags for a contact using a pipe (|) to separate each tag.
- Additionally, you can clear all tags for a contact by placing cf_clear_tags in the tag_list column for said contact.
4. After filling in the relevant information on each row for your contacts, save the file and select Choose File.
5. Verify you've selected to correct file and then select Upload Contacts.