Creating Zones
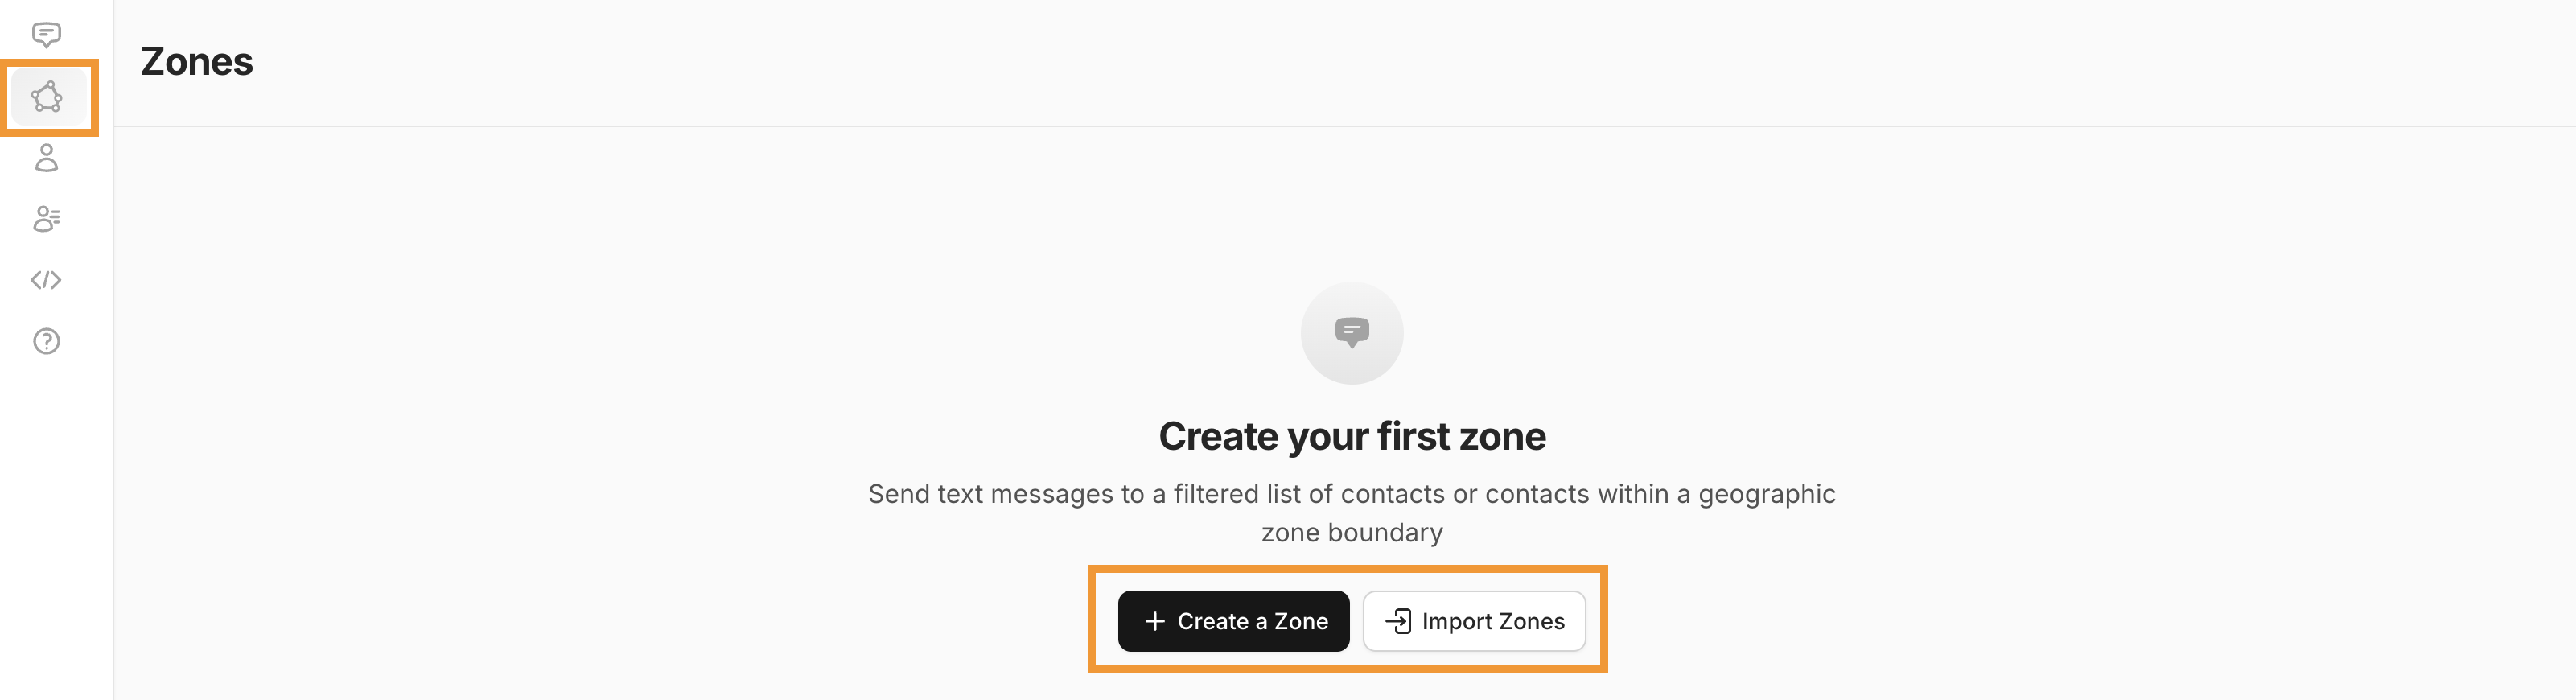
Creating Your First Zone
There are 2 options for creating your first zone:
- Create a Zone
- Import Zones
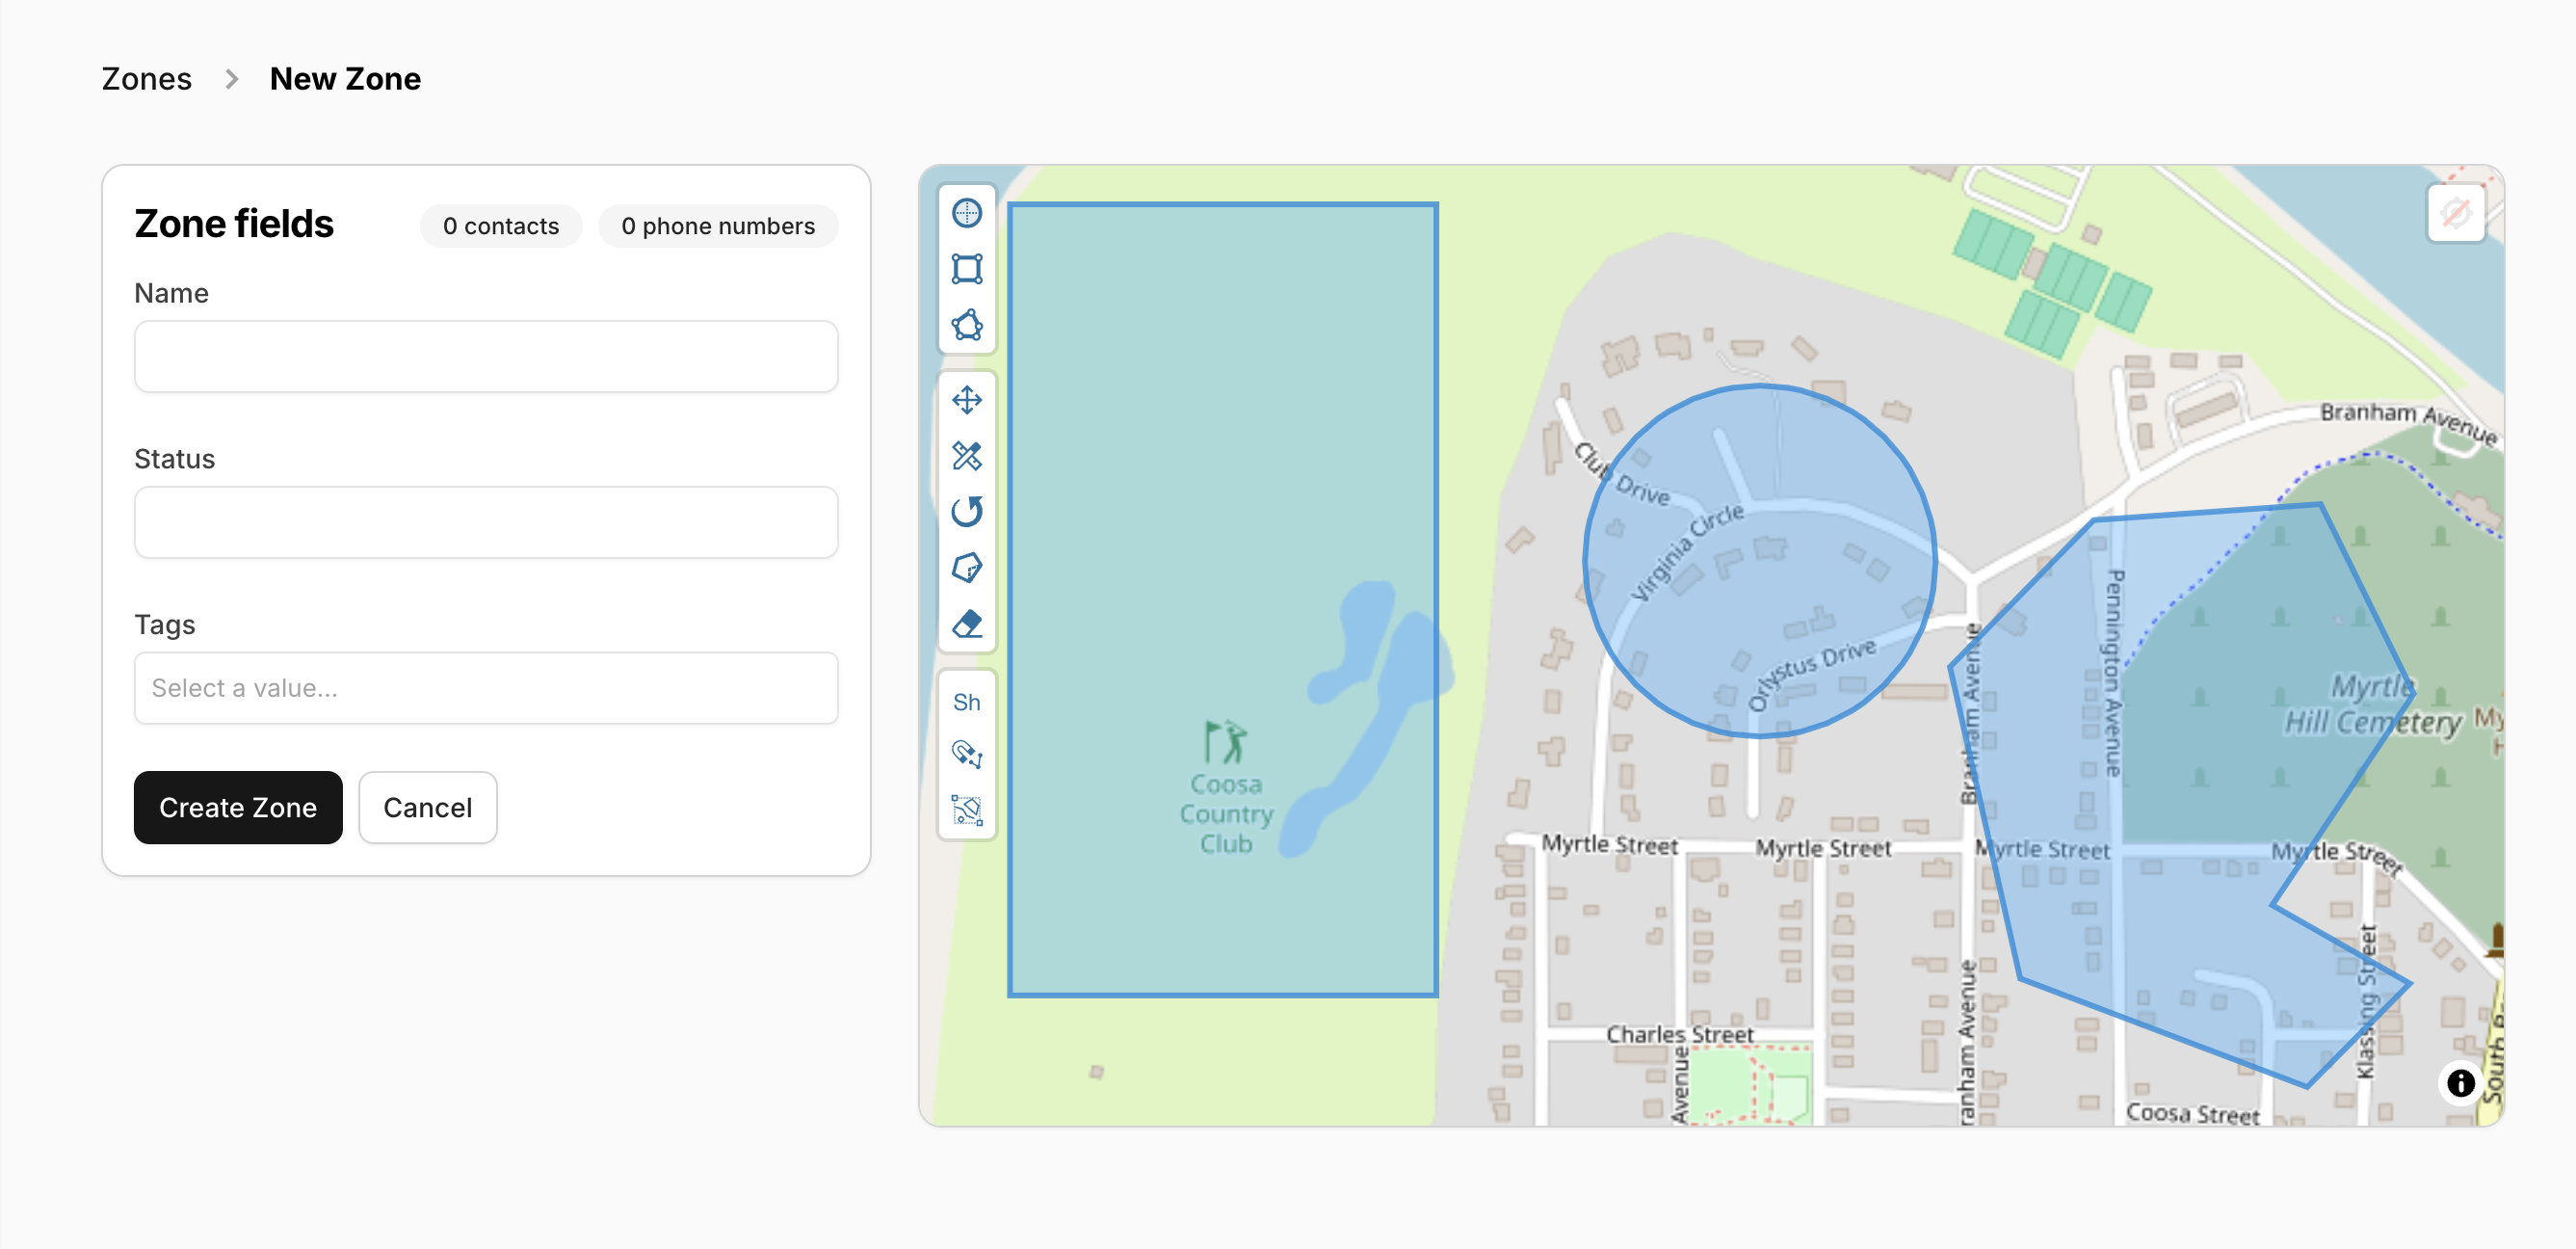
Create a Zone
- Name your zone.
- Set a Status for your zone (not required).
- Apply a Tag or Tag(s) to your zone (not required).
- Draw your zone using the tools from the toolbar on the left side of the map.
- For creating your zones, we have a variety of tools that you may use to navigate your map, draw custom shapes, and edit existing shapes to create completely custom zones.
-
Select "Create Zone" before navigating away from this page.
Import Zones
If you’re creating zones for the first time, select Download Import Template on the Import Zones page.
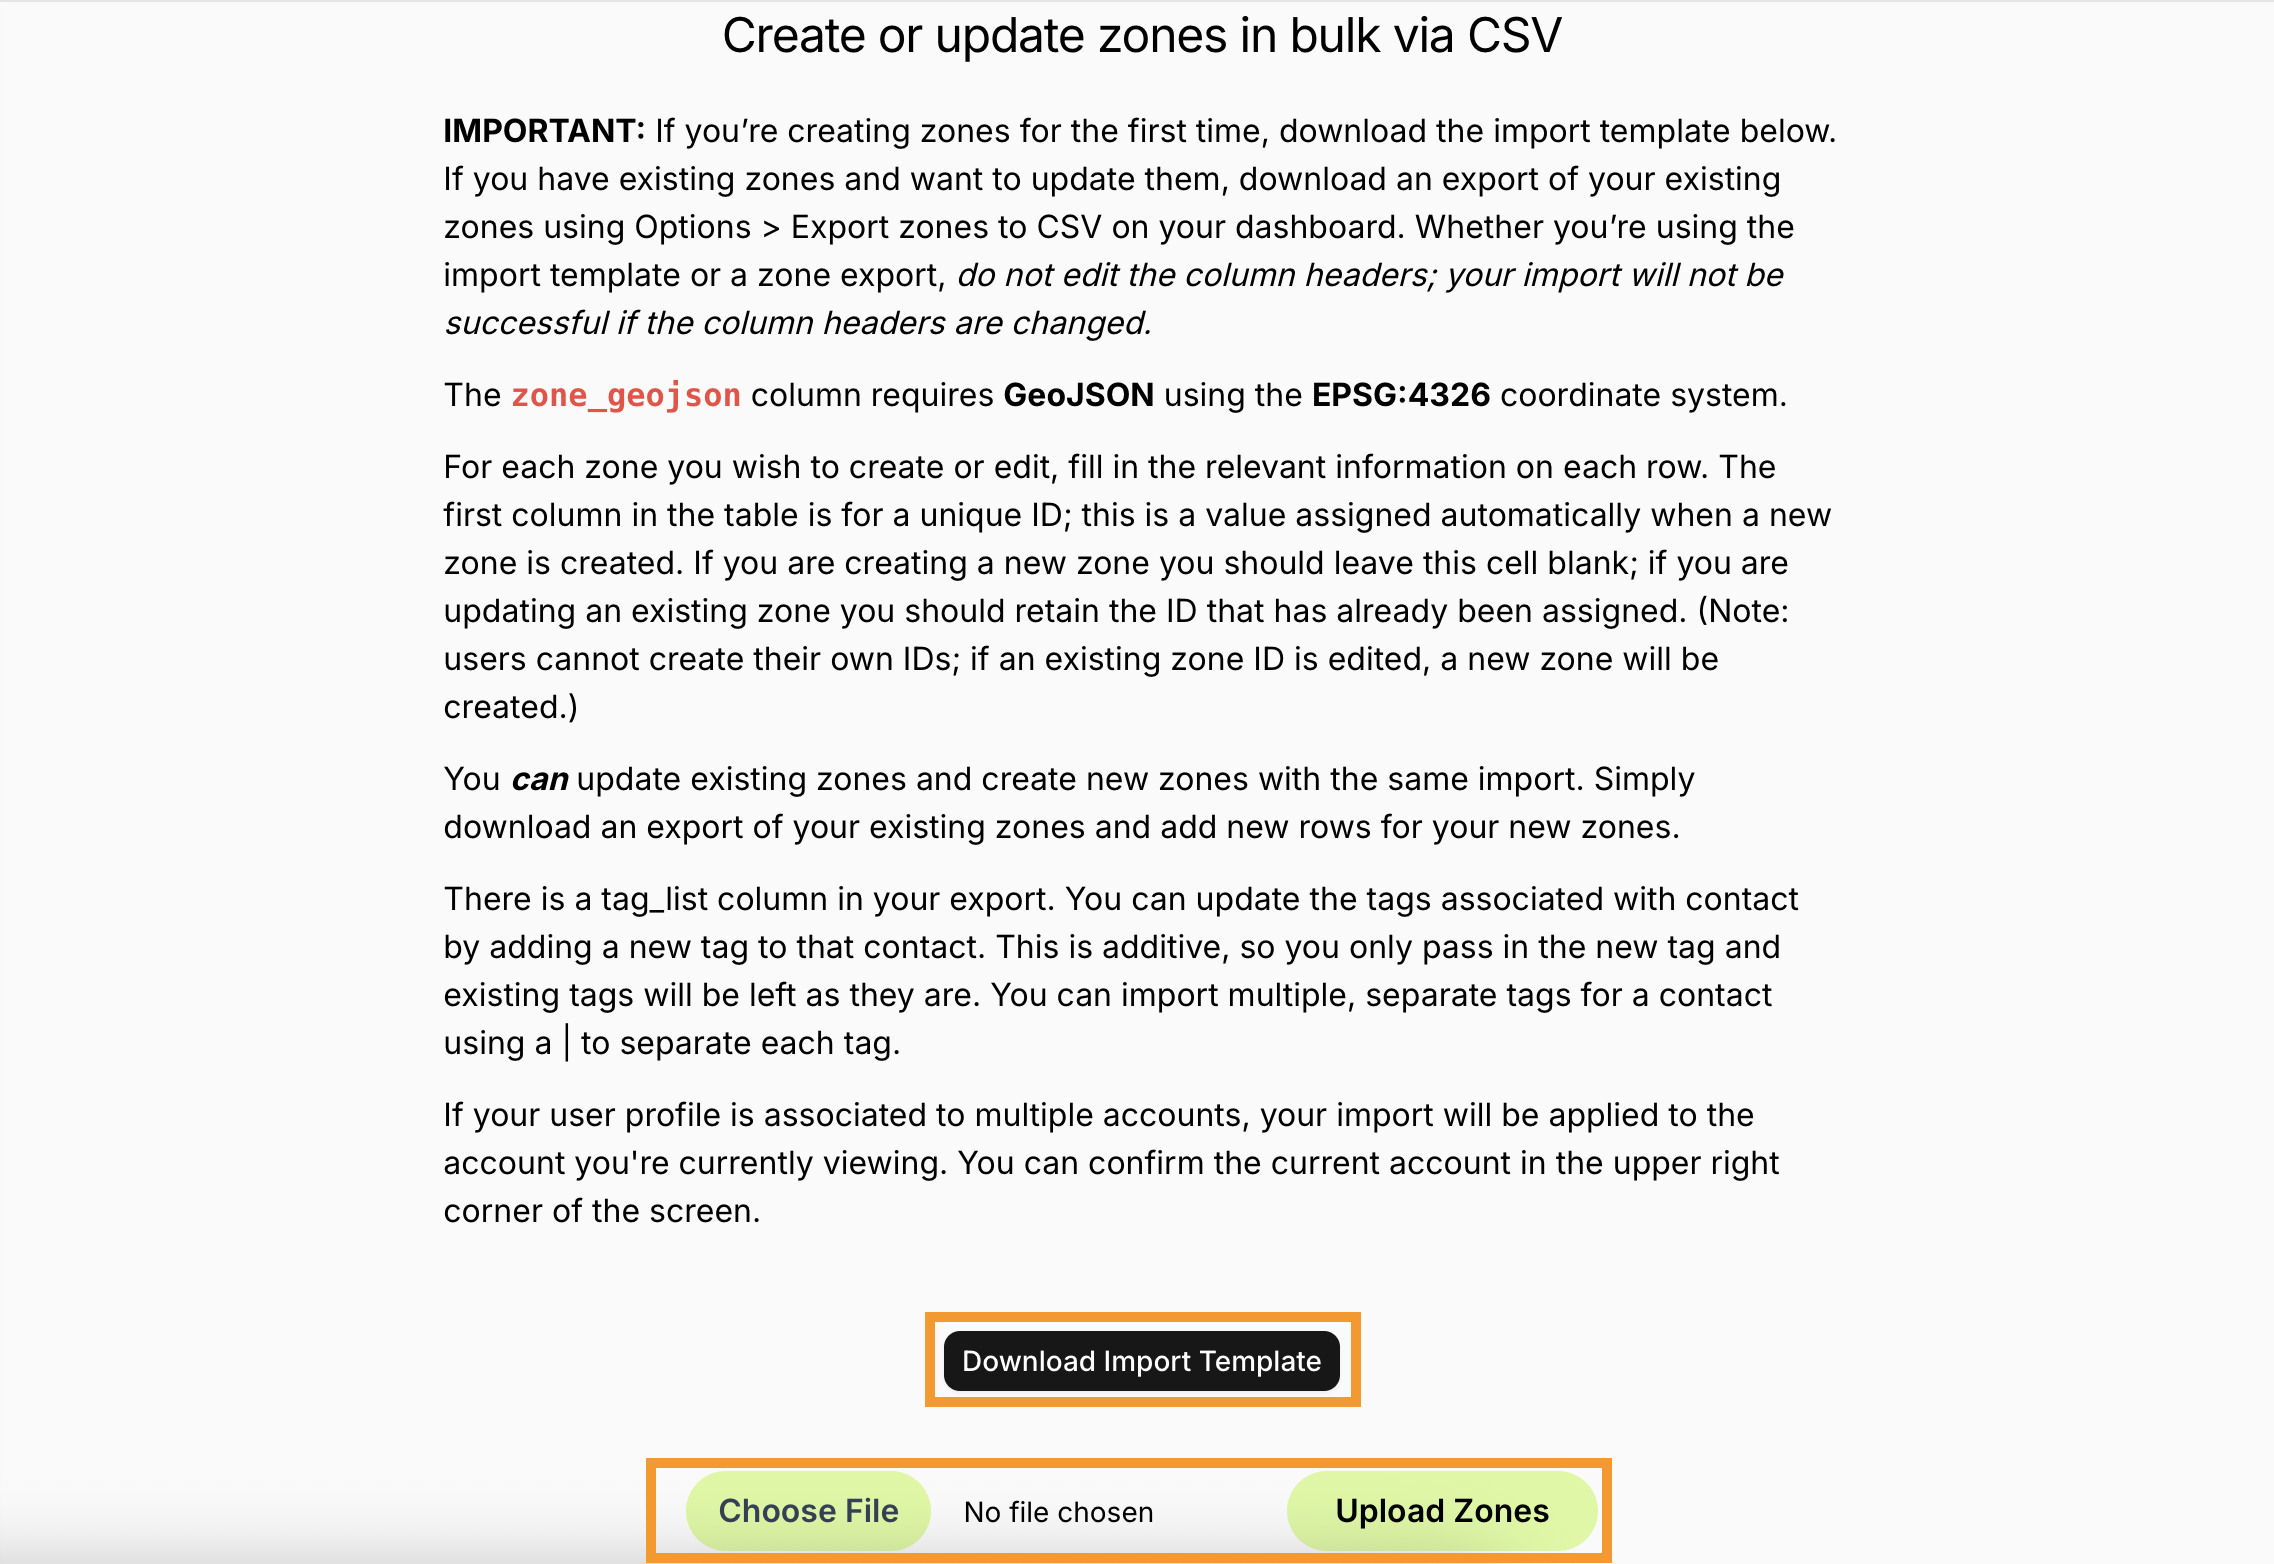
If you have existing zones and want to update them, download an export of your existing zones using Options > Export zones to CSV on your dashboard.
Important Note:
Each column does not need information nor even need to be included as a header but you cannot edit the column headers (ie - change "zone_uuid" to "uuid").
- For each zone you wish to create or edit, fill in the relevant information on each row.
- The first column in the table is for a unique ID; this is a value assigned automatically when a new zone is created.
- If you are creating a new zone you should leave this cell blank.
- If you are updating an existing zone you should retain the ID that has already been assigned.
- You can update existing zones and create new zones with the same import.
- Download an export of your existing zones, apply edits to those as necessary, and add new rows for your new zones.
- You can update the tags associated with a zone by adding a new tag to that zone via the tag_list column in the import file.
- This is additive, so you only pass in the new tag and existing tags will be left as they are.
- The first column in the table is for a unique ID; this is a value assigned automatically when a new zone is created.
- Save your CSV file and select Choose File to attach this new CSV file.
- Select Upload Zones.